Making Sales
Point Of Sale -> Make Sales
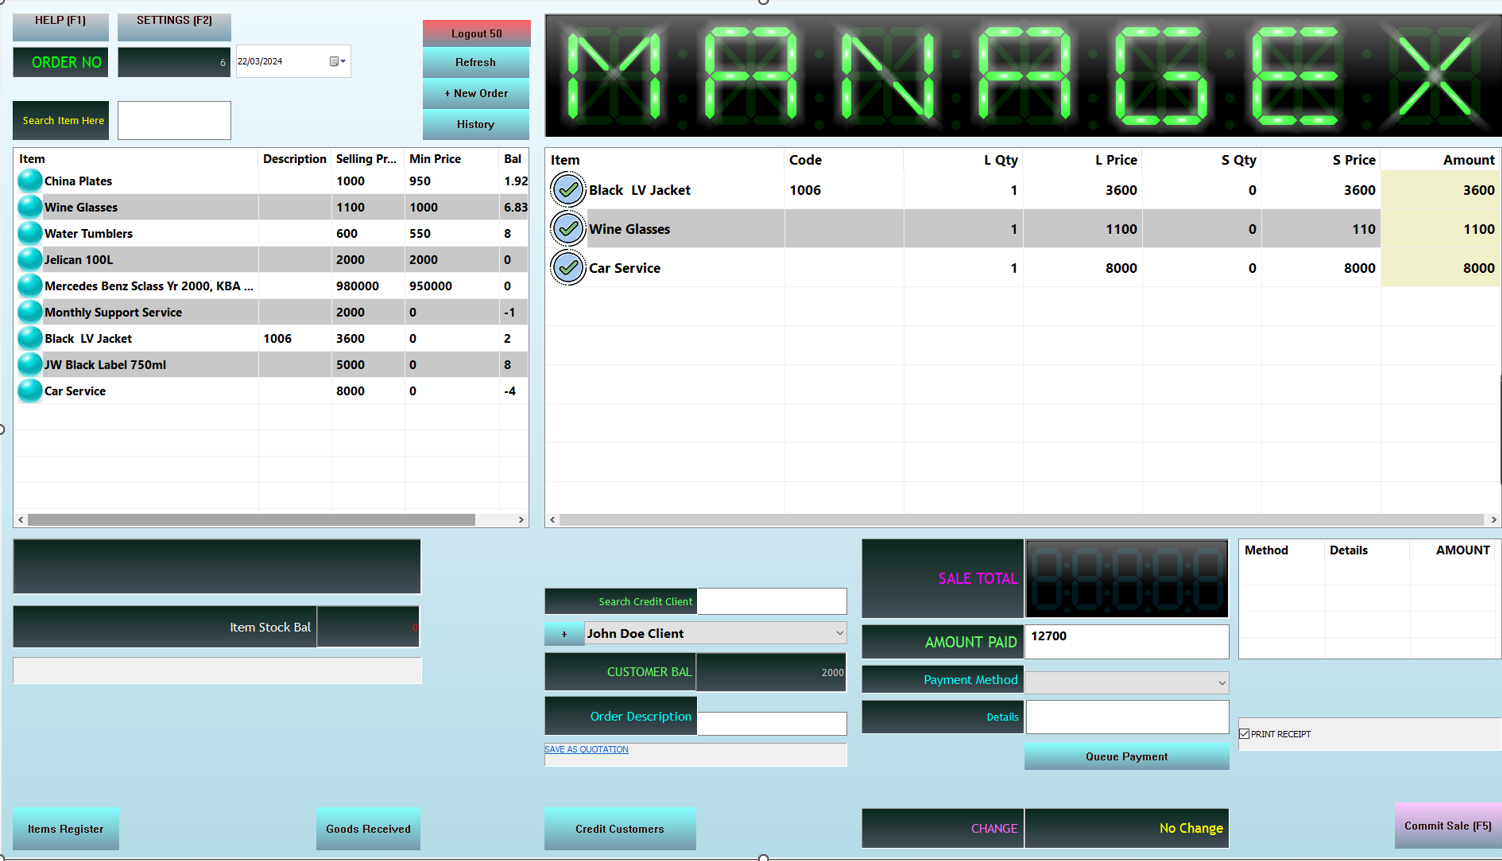
This Window will be used to Make/Generate Quotations and sales (Invoices, Delivery Notes, and Receipts).
For those using Managex Bronze, Your POS can only generate a delivery note and a Receipt, since everything is paid up.
How to make a sale
This process shows how to make a quotation or a sale and produce any of these documents; Quotation, Delivery Note, Invoice & Receipt.
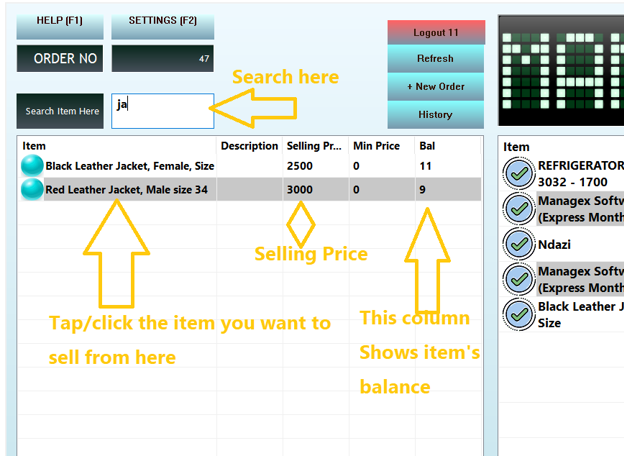
Search for the item as shown in the image above. So long as the item’s full name includes that search word, it will appear in the list below the search area.
Select an item on the list by clicking on it.
Set the quantity of the item to sell, by default it is added with a quantity of 1 in the L Qty column.
Points to note
If the items have smaller quantities, as explained in the Stocks Register e.g. Large quantity is a Box and small quantities are 12 pieces inside the box. You sell a box by putting the quantity in the L Qty, and the small pieces in the S Qty. So If someone buys 2 boxes and 5 small pieces then you’d put 2 in the L Qty, and 5 in the S Qty.
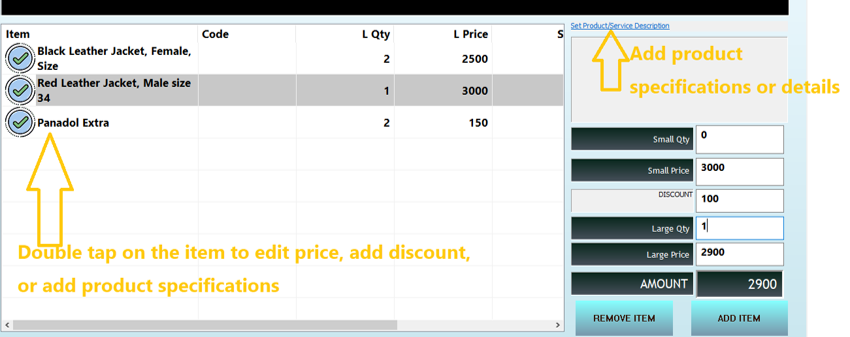
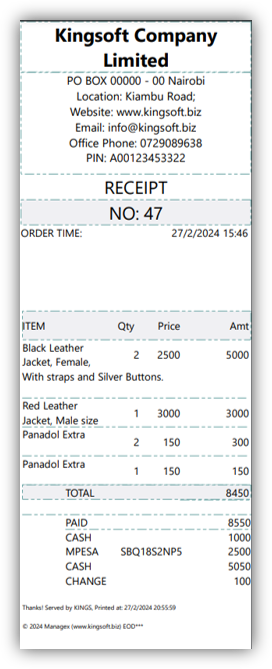
If an Item has not been specified as having Small quantities, or your Express version doesn’t support breaking an item into small pieces, then it doesn’t matter where you put the quantity (in L Qty or in S Qty, since L Price and S Price will be the same value) The amount is combined sale of L qty and S qty, as demonstrated by the sale for Panadol.
If you double tap on the item, from the order list, the buttons and controls on the right side will be visible where you can;
Set the Product/Service Description: A popup will appear where you can type further information to print on the order documents about the product. E.g. If the product is an HP Computer, You can add specifications such as Processor Coi5, 5th Gen, 8GB RAM, etc, If it’s a project phase you can describe the tasks already completed.
For services like recurring monthly invoices that should show dates every time they are generated, you use the hash keywords #date, #month, #year, etc and the system will replace them before printingEdit the large/small quantities and prices
Add a discount amount: This will reduce the L price, For Small price you can edit manually. You can change discounts to operate as percentages in the settings.
If you operate with fixed prices and no negotiations allowed, change that in the settings as showed the last page.
REMOTE ITEM button will remove the double clicked item, from the order.
EDIT ORDER ITEM button will save the information you edit.
How to add payment
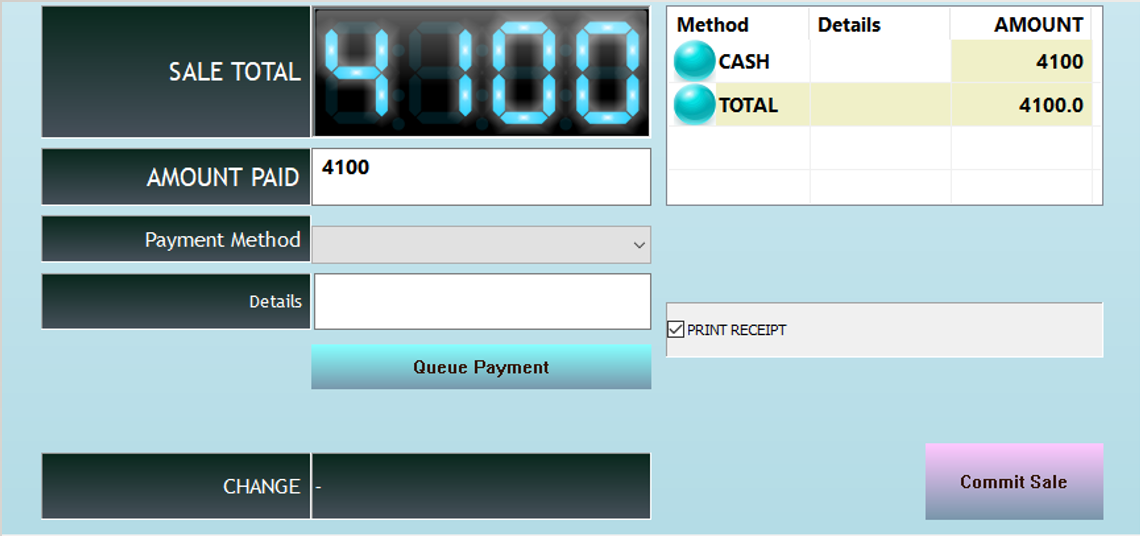
To Record a payment;
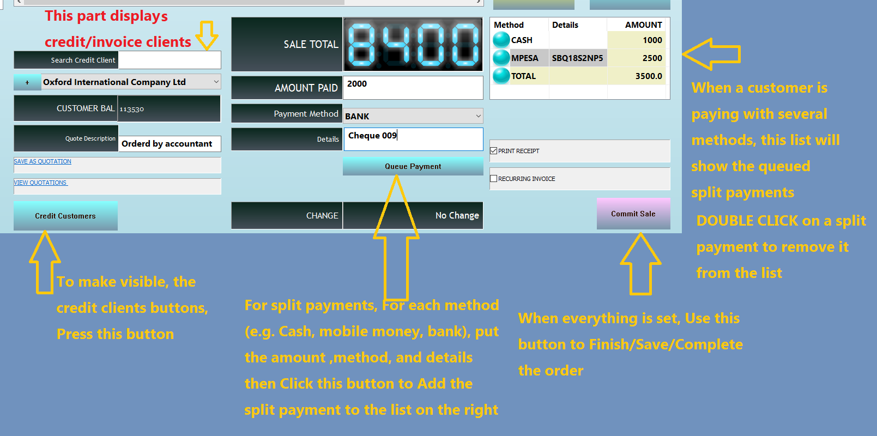
enter AMOUNT PAID
Select Payment Method, and if the method requires you to enter a reference code, enter it in the Details box. if the payment is mobile banking (like Mpesa) and the system is integrated, a pop-up will appear for you to select the message payment.
You don’t have to use the Queue Button if the payment method is one, but if the client makes 2 or more different payments on this order, then you’ll put the amount for one method and Queue-it using the Queue button to the list you see on the right.
Repeat until you have put all payment methods, then you can Commit the sale
Credit Sales
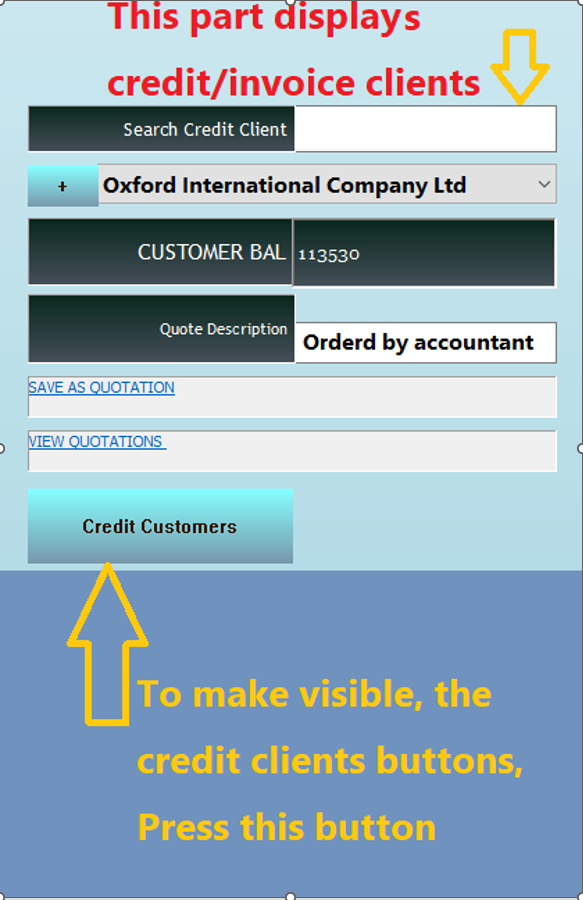
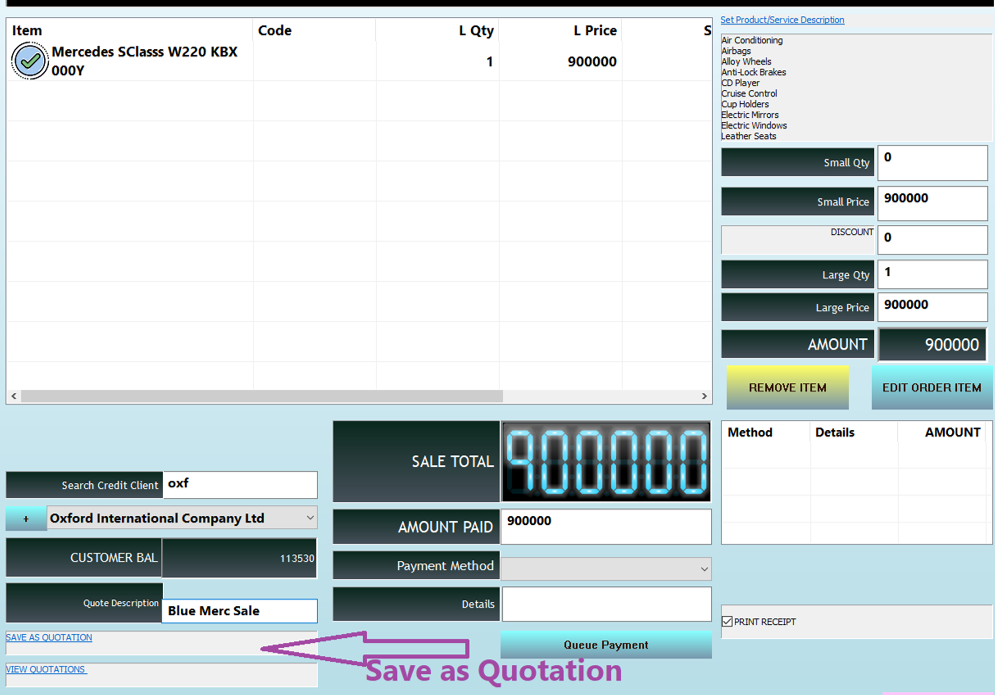
If the full or partial payment is to be done later, click on 'Credit Customers' button for the following credit controls to appear;
You can search among existing clients or select one from the drop list. If you have not registered the client yet, simply tap the + button and a window will appear allowing you to register the client first.
When you select a customer from the list, their balance will show up below.
You can narrate the order using the order description input.
Committing/Completing a sale
To Commit the Sale, click on the Commit Sale Button at the bottom right.
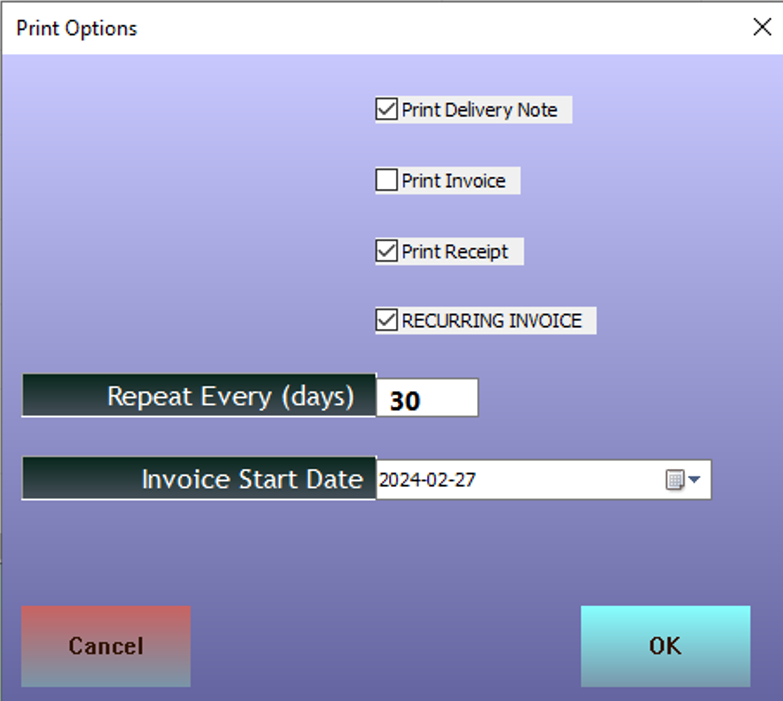
This Print options window will popup.
Select which other Document you want to Print.
If you select 'Recurring invoice' e.g. for a Monthly service such as internet, set the interval of days for the invoice and the next starting date.
Points to note
After the order is committed, only an Admin can edit it.
You can choose if you want to generate a receipt or not.
If Print options setting should be activated to see the print options window.
You can utilize a pdf printer (e.g bullzip printer) to print soft copies.
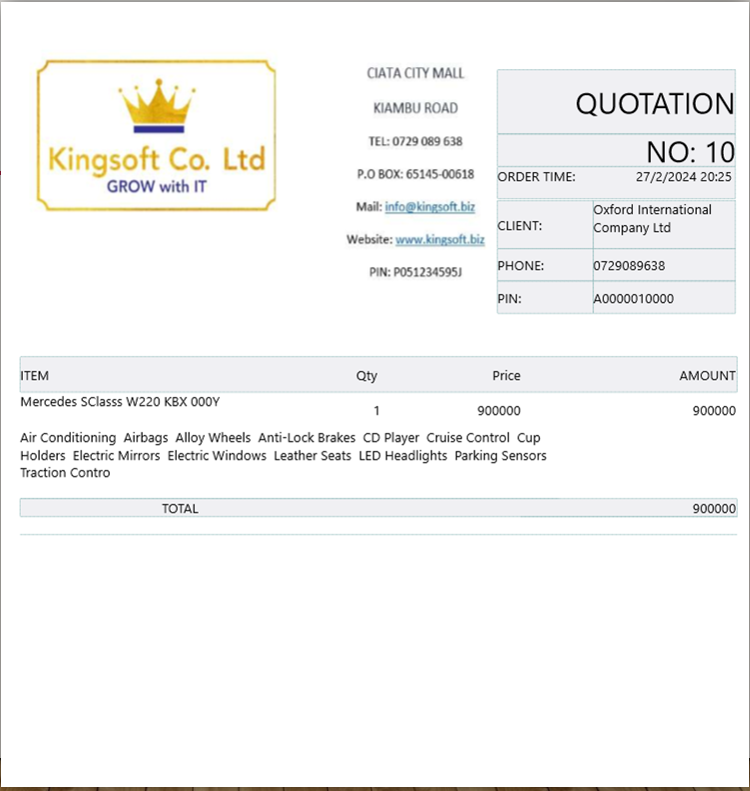
Generating quotations
To generate a quotation, you add the items and specifications just like you’ve been adding to an order except that you dont commit it or add payment (committed orders are counted as sales).
When and if the business goes through, you can come back later, retract the quotation, edit if need be, and commit it as a sale without having to record a sale again.
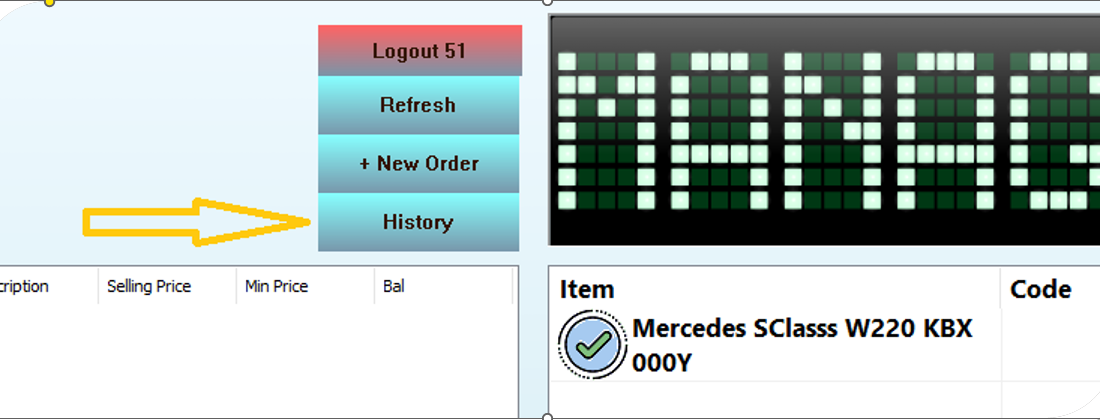
History
Use the History Button, to review past documents.
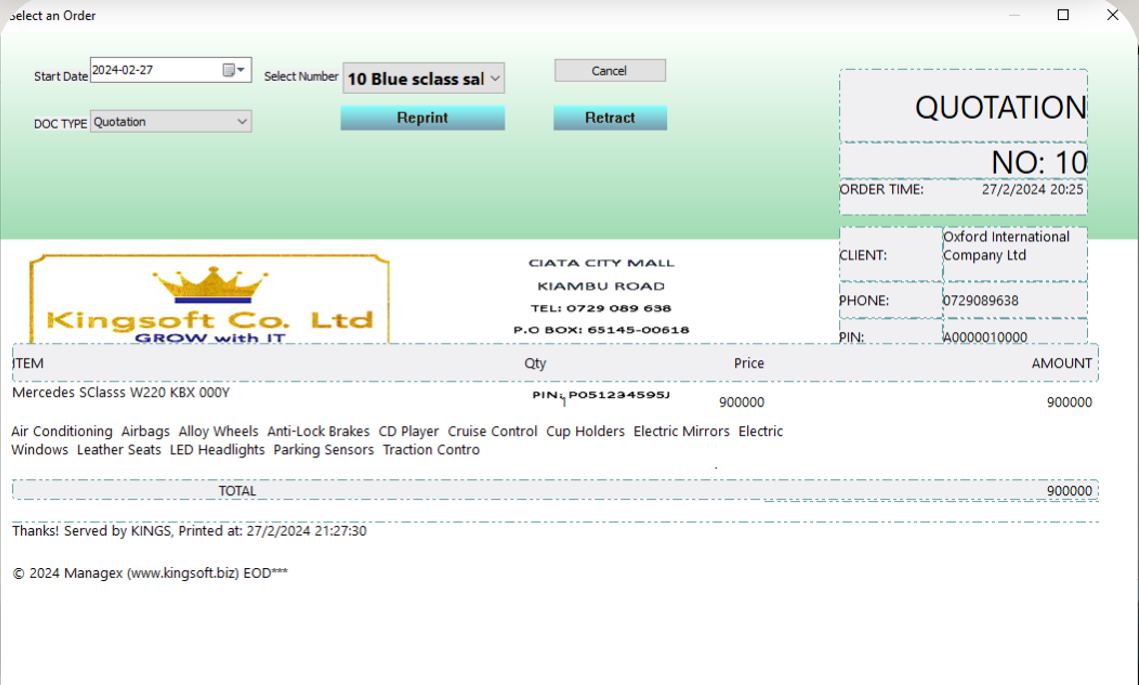
When you Click the History button, the following window will pop up.
Select the start Date (date from when you want to view documents).
Select the document type; Delivery Note, Quotation, Invoice or Receipt, then select from the droplist to the right the order number.
The document info will be shown on the same window. You can view only or reprint it.
If the document is a quotation, you can RETRACT it so that you Commit it as an order.
System admin can also can retract a saved invoice or receipt, edit it then Commit it again.
