Making an Order
Selecting A Counter
If counters have been setup, the moment you login, a dialog will appear for you to pick a counter to which you want to post your order, e.g bar or kitchen counters. This is where your order will be printed.
You can change the counter anytime using the 'change counter' button on your left.
Orders List View
Use the 'Open new order' button to open a new order for a customer. When a new order is opened, it appears in the 'active orders view' with a unique identifier (an order number). The order amount will read zero until items are added onto it.
In a hotel/restaurant setup, this is equivalent opening a bill for a table. But in a club setup, things dont easily add up when trying to track a customer by a table so we allocate each customer an order.
Be sure to note down the order number to keep track of the customer's order to avoid having to go through every order looking for the order with the exact items of the customer.
When a customer with an existing order in the system makes an order for other items, do not open a new order, instead add the items to the existing order and print the bill as another round.
Active orders view
Orders opened show up in this view, each row shows the order number, order amount, the time the order was opened, whether or not the order is locked, why it's locked and a brief narration that you can put.
Order status - color codes
Each row in the active orders view has a color representing the order's current status.
White or grey has no significant meaning, it's just a visual enhancement to ensure you can easily see a row to the end.
A Bright yellow highlight means the order is locked because it has been forwarded but not cleared by the cashier.
A Dark grey highlight means the order's final bill has been printed.
A Pink highlight means the order is locked because its in the process of a return.
You cannot add items to a locked bill. The locked column of the row will show 'YES' and the 'lock-status' column describes the reason the order is locked.
The currently selected/active row is highlighted in blue. If you add new order items, they will be added to this order. If you print the bill, any of the order's items that have not already been printed will be printed. It is also the order that is shown at the Top.
When you select an order, you will be able to view its items in the order items view below.
Order Items View
Shows the items inside a selected order.
Items that have been printed in a round appear highlighted in yellow and the 'printed' column reads 'YES'.
Once an order item is printed it cannot be removed from the order unless returned by approval from the manager.
Order items not printed appear in white or grey and can be removed freely from the order in case they were added by mistake.
The 'Chk' column shows the Check/round number that the item was printed as a part of. If the item has not been printed, this column reads 0.
Locked orders do not show their items.
Adding an item to an order
Once you have opened a new order, you can select it and begin to add items to it.
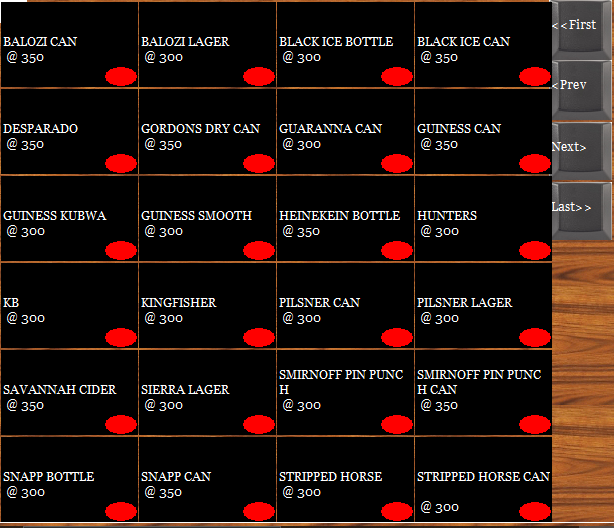
Browse through the available P.O.S item categories on the top left hand side. When you click on a category you are presented with the items within it, sorted in alphabetical order. When you select an item, its name appears in the preparation area.
Please note: It's beneficial to know what items are in what categories. Having to go through all categories to find an item is a slow, inefficient practice that will have you spend a lot of time making an order (slowing down everyone else waiting to use the POS terminal).
The preparation area
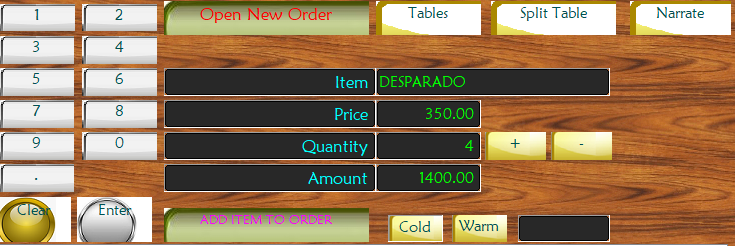
This is the area where you confirm the specifics of the order item such as quantity and temperature (sold or warm) before it is added to the order.
If the quantity is in fractional units e.g for butchery items, use the 'set qty' button to set the precise quantity.
Once you are done, click on the 'add item to order' button and the item will appear in the Order Items View.
If you selected the wrong item but are yet to add it to order, simply select the intended item and it will replace any item in the preparation area.
If you already added the wrong item to order, simply select it in the Order Items View, click the 'remove' button and it will be removed from the order (as long as the item is not already printed).
Printing your order
To print the bill for your order, click the 'Print Order' button. The order will print at the selected/relevant counter, collect your copy for the customer.
To view a soft copy of the orders printed to the counter and their check numbers, click on the 'Order Checks' button. This will open the Order checks view.
Do not leave unprinted orders in your account, ensure that you either print them to be served with the order items or remove them since they aren't printed yet.
The total of unpaid orders amount also includes the unprinted or forwarded but uncleared orders.
Order Checks View
In this view, you can see a list of the orders that you have printed that day (A cashier can view checks printed by all waitresses or any that they select)
When an order is first printed, it shows up as 'round 1', you can add other items onto it and print the same order again (this time as round 2) and so on, until the final bill is printed, After that, the order becomes locked and no more items can be added. You now have to forward the bill.
In the event of something happening to the final bill and you have to print another, Request it from your admin, only they can reprint the final bill (by going to their order checks view, clicking on your final bill and tapping 'YES')
The system can however be configured to allow unlimited printing of bills.


